
I didn’t realize how badly my washing machine needed a deep clean—until it started ruining my laundry.
At first, it was small things: a weird smell here, a strange noise there. But when my freshly washed clothes came out smelling worse than before, I knew something wasn’t right.
If you’re going through something similar—or even if you’re just trying to prevent a disaster—this guide is for you. These are 10 real signs I personally faced, or have seen friends and family struggle with, and exactly what I did to fix them.
Let’s get started with our Ultimate guide on: Washing Machine Needs a Deep Clean
Also read our guide on: Washing Machine Capacity
1. Laundry Smells Bad Even After Washing?

Let me take you back to a moment I still remember vividly.
I had just pulled out a batch of freshly washed towels—warm, fluffy… and smelling like wet dog. I stood there in disbelief. I’d used good detergent, softener, even warm water. But still, that stale, sour smell clung to the fabric like it had never even touched soap.
If you’ve ever had that experience, you’re not alone. It’s frustrating, embarrassing, and frankly, confusing.
But here’s what I discovered:
👉 It’s not your detergent. It’s your washing machine.
Why Does It Happen?
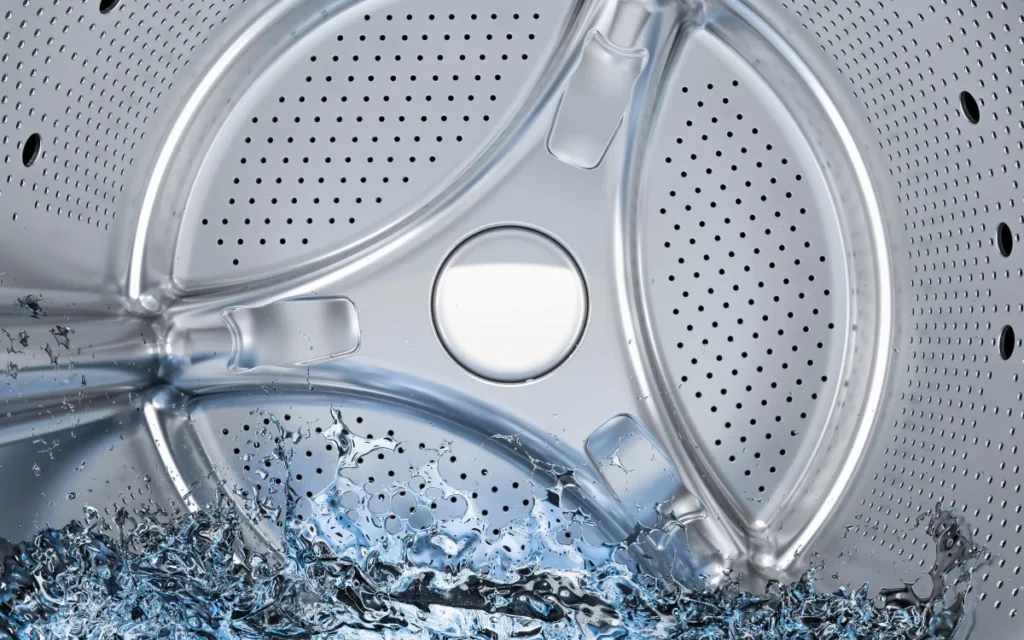
Over time, residue from detergents, fabric softeners, and dirty laundry builds up inside your washer. Mix that with leftover moisture and you’ve got the perfect breeding ground for mold and bacteria, especially in front-load washers.
And here’s the kicker: you may not even see it. It hides in the drum crevices, under the rubber gasket, and deep inside the detergent drawer.
So what happens?
Even if you throw in the most fragrant detergent on the market, your machine is pushing all that musty gunk right back onto your clothes.
How I Fixed It (And You Can Too)
1. Deep Clean the Drum
I ran an empty cycle on the hottest setting with:
- 2 cups of white vinegar poured directly into the drum
- Followed by half a cup of baking soda (you can add this to the detergent drawer)
This combination breaks down grime, kills odor-causing bacteria, and dissolves soap scum.
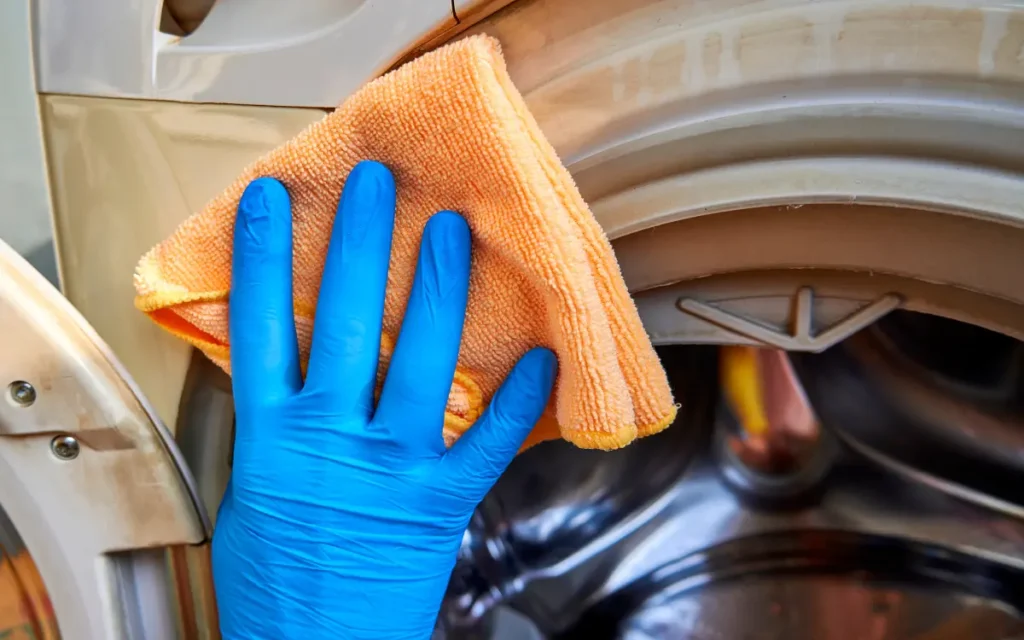
2. Scrub the Rubber Gasket
I didn’t realize how bad it was until I wiped under the rubber seal of my front-loader.
There was black sludge. No wonder it smelled awful.
I used a mix of:
- Baking soda + dish soap paste
- A small brush (an old toothbrush works great)
Then I dried it thoroughly with a microfiber cloth and left the door open overnight.
3. Clean the Detergent Tray
I pulled it out, and yep—there was mold growing inside the little compartments.
So I soaked the tray in warm soapy water, scrubbed it clean, and wiped inside the drawer housing. Now I do this once a month.
4. Let It Breathe
This one’s simple but game-changing:
Leave the washer door open after every load.
Trapped moisture = mold party. Letting it air out keeps things fresh.
💡 Bonus Tip: Rethink Your Detergent
Too much detergent leaves residue behind, especially in hard water. Start using the liquid detergent in the recommended amount.
2. Your Washing Machine Smells Bad?

I’ll never forget the day I walked into my laundry room and thought, “Did something die in here?”
I looked around, checked the trash, and peeked behind the door—nothing.
Then it hit me. The smell was coming from inside the washing machine.
It was musty. Sour. Almost like mildew mixed with standing water.
And the most frustrating part? I had just done the laundry the night before.
Sound familiar?
Why Does a Washing Machine Smell Bad?
Let’s get real for a moment. Washing machines deal with a lot of grime. Dirty clothes, detergent residue, and moisture—all of it combines into the perfect cocktail for bacterial growth and mold.
Over time, that gunk:
- Gets trapped behind the rubber door seal (especially in front-loaders)
- Builds up in the detergent drawer
- Lingers in the filter and drainage system
And because the drum looks clean, we assume everything’s fine. But under the surface? It’s often a humid, moldy mess.
My Mistakes (So You Don’t Repeat Them)
Before I learned how to fix this, I made the same mistake many of us do—I thought running hot water and using more detergent would solve the issue.
Spoiler alert: It made it worse.
Why?
Because detergent builds up too. And softeners? They coat the inside with a film that traps dirt and bacteria.
How I Got Rid of That Smell for Good
After trying a few quick fixes that only masked the smell, I committed to a deep clean routine that actually worked.
1. I Cleaned the Gasket (The Mold Hideout)
I gently pulled back the rubber seal around the drum, and was horrified.
There was black sludge hiding underneath. It had been there for months.
Fix:
- Mixed baking soda with a bit of dish soap
- Used an old toothbrush to scrub the area
- Wiped it all with a warm, damp cloth
- Dried it completely (this step matters!)
2. Flushed the Drum with Natural Cleaners
Instead of harsh chemicals, I went the gentle but effective route:
- Poured 2 cups of white vinegar directly into the drum
- Added half a cup of baking soda to the detergent tray
- Ran the machine on its hottest, longest cycle
The result? That swampy smell started fading by the end of the first cycle.
3. Washed the Detergent Tray
I never thought to check this—until I pulled it out and found gunk, mold, and leftover softener caked in the corners.
Fix:
- Soaked it in warm, soapy water
- Used earbuds and a small brush to reach tight spots
- Cleaned the inside of the drawer slot, too
4. Drained and Cleaned the Filter
This part surprised me the most. When I unscrewed the filter, I found coins, lint, hairpins, and a smelly puddle of grey water.
Fix:
- Placed a towel underneath
- Drained it slowly
- Removed and rinsed the filter thoroughly
- Cleaned the area with a soft cloth
5. Let It Breathe (The Simplest Fix of All)
One habit that changed everything?
Leaving the washer door and detergent drawer open after every wash.
It helps air circulate and prevents that damp, moldy environment from returning.
💡 Extra Tips That Helped Me
- Switch to liquid detergent: Powders often leave more residue.
- Use less detergent: I used to think more soap = cleaner clothes. In reality, it just creates more buildup.
- Wipe the gasket weekly: Just a quick once-over with a dry cloth after each wash helps immensely.
3. Noticed Slime or Gunk Inside Your Washing Machine?
Let me be honest: I didn’t check the inside of my washing machine for months.
I assumed it was clean because, well, it washes things. But one day, while unloading laundry, I noticed a weird slippery patch around the rubber ring. Curious (and a little grossed out), I took a closer look and pulled the gasket back.
What I found made my stomach turn.
There it was—a slimy layer of blackish-grey gunk, quietly growing behind the seal. It looked like mold, felt like wet clay, and smelled like a damp basement. That’s when it hit me: I’d been washing my clothes in this?
What Is That Slime, and Why Does It Show Up?
Here’s what I’ve learned from that eye-opening moment:
That gunk is called biofilm. It’s a sticky combination of:
- Detergent residue
- Fabric softener buildup
- Moisture
- Dirt from clothes
- And naturally… bacteria and mold
This filth clings to places where water doesn’t fully drain, especially inside the rubber gasket, detergent tray corners, and even along the edges of the drum.
And because most of us don’t clean these spots regularly, the slime just keeps building up.
Why You Shouldn’t Ignore It
I made the mistake of thinking, “It’s just cosmetic, right?”
Nope.
That slime:
- Transfers onto your clothes (especially during hot, humid weather)
- Causes musty smells
- Can lead to mold allergies or skin irritation—especially in kids
- And worst of all, it can damage your machine over time
It’s not just ugly—it’s a hygiene risk.
How I Got Rid of the Slime (In 3 Steps)
After that discovery, I couldn’t unsee it. So I rolled up my sleeves and got to work—nothing fancy, just what I had at home.
1. Scrubbed the Gasket with Baking Soda Paste
- Mixed 2 tablespoons of baking soda with a few drops of dish soap and a splash of water.
- Used an old toothbrush to scrub underneath the rubber seal—yes, you’ll have to gently pull it back.
- Wiped everything off with a damp microfiber cloth.
2. Ran a Hot Cleaning Cycle
Once the surface grime was gone, I ran an empty cycle with:
- 2 cups of white vinegar in the drum
- A half-cup of baking soda in the detergent drawer This helped flush out the leftover mold spores and broke down internal residue.
3. Dried the Drum and Left the Door Open
After cleaning, I made it a point to dry the rubber seal with a towel after every wash.
It takes two minutes, but stops slime from coming back.
💡 Prevention Tips I Swear By Now
- Check behind the rubber seal weekly — even if it “looks” clean
- Avoid overusing detergent or softener — a little goes a long way
- Run a drum clean cycle monthly — or at least once every 5-6 weeks
- Leave the door and tray open — airflow = less moisture = no slime
4. Your Washer Makes Strange Noises While Running?
It started as a low thump.
Then it grew into a loud banging noise—like a pair of sneakers were trapped inside the drum (even though there weren’t any).
One evening, my washer sounded like it was gearing up for takeoff. My wife looked at me and asked, “Is this thing safe to use?” Honestly? I wasn’t sure. The noise was unsettling.
At first, I blamed the machine. It wasn’t new, but it had always worked fine. But after doing some digging (and nearly calling a repair guy), I discovered the real cause—and it wasn’t what I expected.
Why Is Your Washing Machine So Noisy?
A lot of people think strange washer noises mean it’s broken. I did too.
But here’s what I found out: most strange sounds come from internal grime, imbalance, or blocked parts—especially when the machine hasn’t been cleaned in a while.
Common causes include:
- Uneven dirt buildup in the drum
- Clogged or overfilled drain filter
- Loose coins or buttons trapped under the drum
- Hard water residue causing minor internal friction
- And sometimes… It’s just not level on the ground
The machine’s trying to work, but the junk inside is throwing it off balance.
How I Fixed the Noise (Without Calling a Technician)
Once I understood what was really going on, I followed these steps—and honestly, the results surprised me.
1. Deep-cleaned the Drum
I poured two cups of white vinegar into the drum, added baking soda to the detergent tray, and ran it on the hottest cycle.
It helped dislodge grime buildup and cleared out whatever was rattling inside.
Later, I found a loose hair clip tucked between the drum and the rubber gasket. That little thing caused all that ruckus!
2. Checked and Cleaned the Drain Filter
When I opened the drain flap, I found lint, a rusted coin, and what looked like a tiny sock stuck inside.
No wonder it was struggling to spin properly.
Cleaning it took 10 minutes and made a huge difference.
3. Leveled the Machine
This one caught me off guard. One of the washer’s feet wasn’t properly aligned, causing the drum to tilt slightly during high-speed spins.
I grabbed a wrench and adjusted the height of the legs until the machine sat firm and flat on the floor. The noise? Gone.
What I Learned (The Hard Way)
- Strange noises don’t always mean your washer is dying.
- Dirt, coins, or buildup in hidden spots can throw everything off balance.
- Regular cleaning isn’t just about hygiene—it’s about preventing mechanical issues too.
💡 Tips to Keep It Running Smooth and Quiet
- Clean your washer’s filter every 4–6 weeks
- Run a drum clean cycle monthly (or with every 15–20 loads)
- Avoid overloading the drum—it strains the motor
- Check your machine’s level if it ever rocks or shakes
5. Lint on Clothes After Washing? I Thought My Washer Was Ruining My Outfits
It started with tiny fuzz balls on my black T-shirt.
Then came the lint streaks on my freshly washed bedsheet. And one day, my wife pulled out her favorite cotton kurti—only to find it covered in clingy white lint.
Her first reaction? “What’s wrong with our machine?”
Mine too.
At first, I blamed the clothes—maybe we washed something fuzzy. But as it kept happening, even with regular loads, I realized something was off inside the washer.
What Causes Lint After Washing?
Here’s what I didn’t know back then: lint is more than just fabric fluff. It’s a sign that something inside your washer isn’t working like it should—or hasn’t been cleaned in a long time.
The main culprits I discovered were:
- Dirty or clogged lint filters (especially in top-load washers)
- Soap scum and residue inside the drum
- Washing mixed fabric types together (like towels with delicate clothes)
- Using too much detergent, which breaks fabric fibers faster
- Poor drainage causes lint to settle back on clothes
The washer wasn’t broken. It was just overdue for a serious clean.
How I Got Rid of Lint on My Laundry?
After weeks of frustration and wasted re-washing, here’s what finally worked for me:
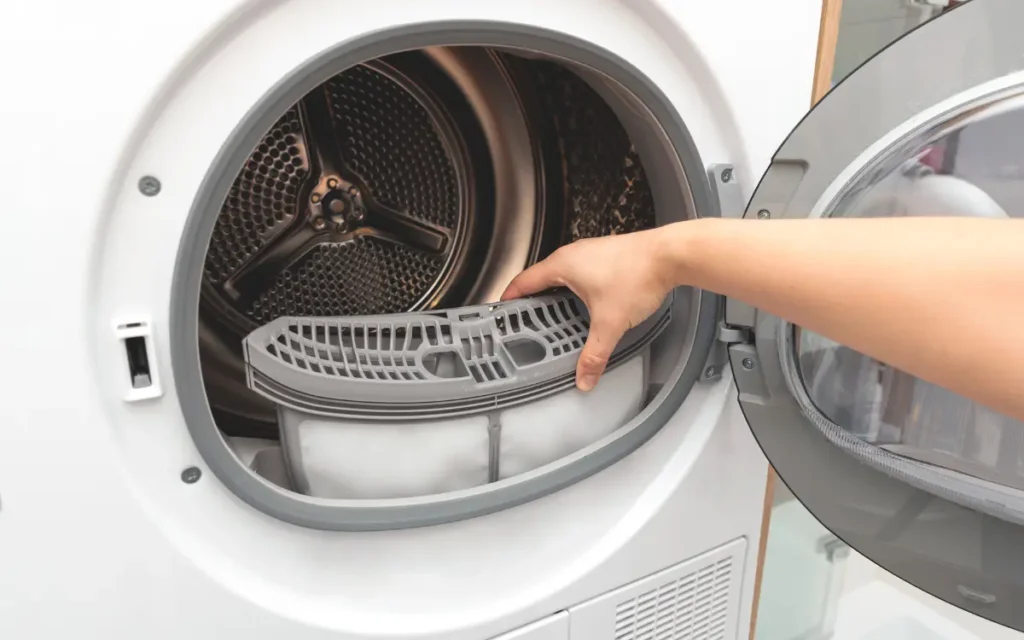
1. Cleaned the Washer’s Filter
You know that little panel at the bottom front of the machine? That’s your drain filter.
I opened it, and was shocked to find a clump of lint, hair, and a rogue sock stuck inside.
Fix:
- Placed a towel under the flap
- Slowly drained any leftover water
- Unscrewed and removed the filter
- Rinsed it under tap water and gently brushed off debris
Now I clean it every 3-4 weeks. It takes minutes and saves loads of frustration.
2. Ran a Hot Vinegar-Baking Soda Cycle
I poured 2 cups of vinegar into the drum and half a cup of baking soda into the detergent tray, then ran the hottest cycle available.
That helped dissolve fabric softener buildup and detergent film where lint was getting trapped.
3. Changed My Laundry Habits (Just a Bit)
- I stopped washing towels and cottons with synthetics or delicate fabrics.
- I switched to liquid detergent—powder often leaves more residue, especially in hard water.
- And I cut back on the amount of detergent I used. (More soap = more suds = more lint)
What I Didn’t Realize Before
- Lint doesn’t always come from the clothes—it can come from the machine itself
- Over time, built-up grime inside your washer starts redistributing onto your laundry
- Even newer washers need regular cleaning to prevent this problem
💡 Ongoing Tips That Keep My Clothes Lint-Free
- Clean the filter every month (or every 15–20 loads)
- Don’t overload the drum—more rubbing = more lint
- Avoid washing dark clothes with items that shed
- Use a lint catcher bag if you often wash lint-heavy fabrics (like wool, towels, or blankets)
6. Washing Machine Not Draining?
There’s nothing quite like opening your washing machine expecting clean, ready-to-dry clothes… and instead finding them floating in dirty water.
This happened to me last monsoon. I had a full load of clothes, including school uniforms and office shirts, and I was in a rush. I opened the lid—and boom. Water. Everywhere. The drum was half full. Clothes were soaked. The machine had just stopped mid-cycle, like it had given up on life.
Panic mode: activated.
Why It’s More Than Just Inconvenient
A washer that won’t drain doesn’t just throw off your routine—it leaves your clothes:
- Soaking wet and heavy to lift
- Smelling terrible after sitting in water
- And often needing a complete re-wash
What Causes a Washer to Stop Draining?
Here’s what I learned (the hard way):
- Clogged drain filter (mine had hair, lint, coins, even a button)
- Blocked drain hose
- Overuse of detergent, creating excess suds and residue
- Sometimes: a child’s sock or hairpin getting sucked into the system
It’s almost always a maintenance issue—not a major fault.
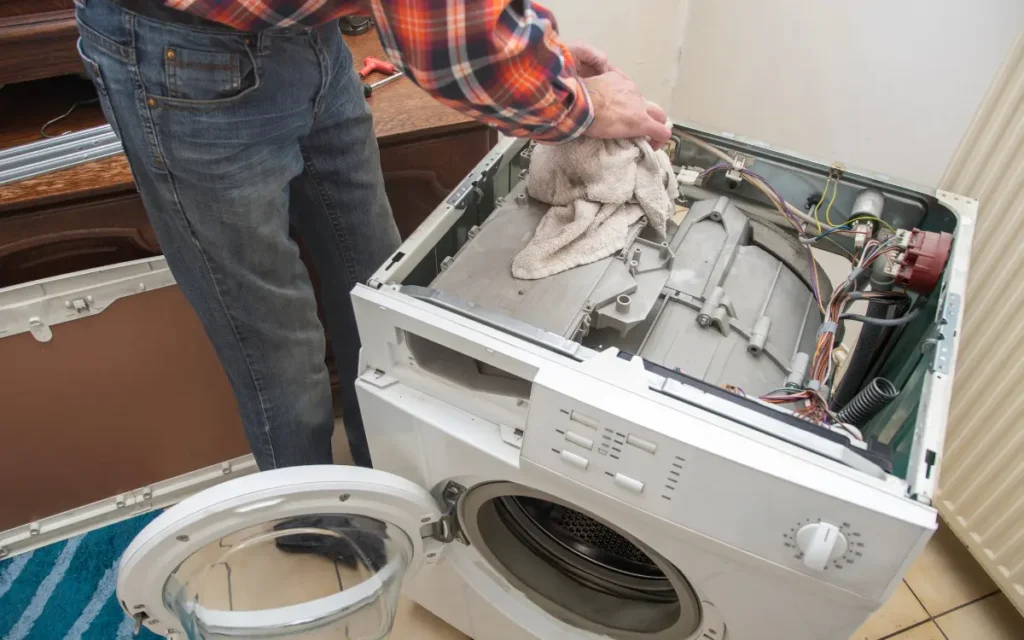
How I Fixed It Myself (No Technician Needed)
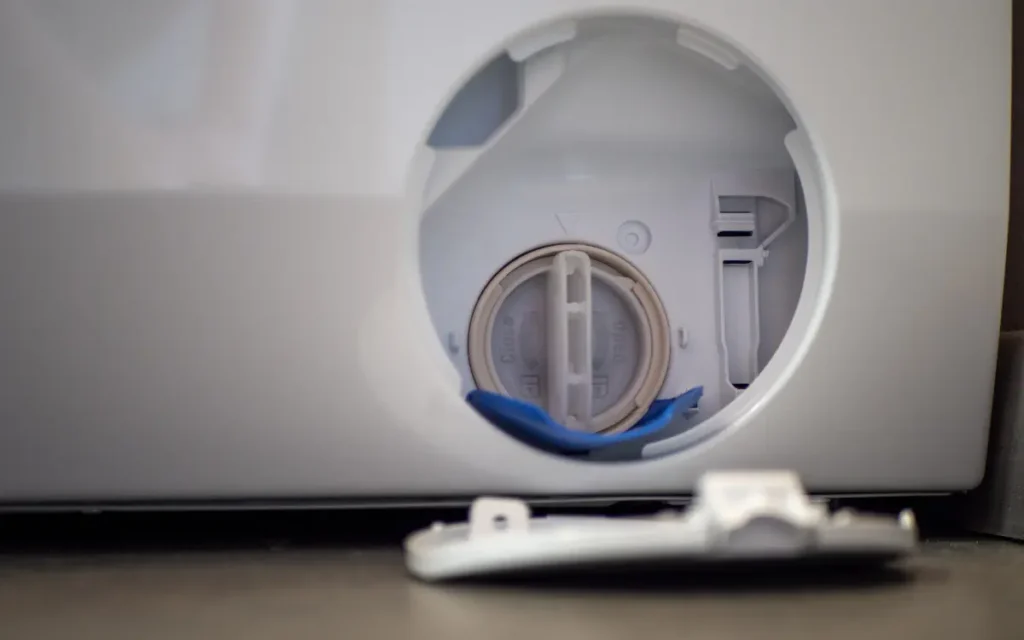
1. I Drained the Machine Manually
- Unplugged the washer
- Laid towels around the base (it gets messy)
- Opened the filter flap (usually at the bottom front)
- Slowly unscrewed the filter and let the water drain into a bowl Tip: Go slow. It gushes out.
2. Pulled Out the Gunk
Inside the filter was a disgusting mix of lint, a bobby pin, and what looked like a piece of old detergent pod. I cleaned it under warm running water, scrubbing gently with an old toothbrush.
3. Checked the Drain Hose
I removed the hose from the back (wear gloves—it’s not pretty) and flushed it through with water.
A clump of lint and thread came out. That alone could’ve blocked the flow.
4. Ran a Hot Vinegar Cycle
Just to be safe, I ran an empty hot cycle with vinegar to flush out any leftover residue.
Note: Still having issues, it is nothing wrong to consult a technician.
What I Know Now (That I Wish I Knew Then)
- Most drainage problems are preventable
- Cleaning the filter takes under 10 minutes, but saves hours of hassle
- You don’t need a technician every time—just a towel, some patience, and a bit of DIY courage
Who This Affects Most
- Busy parents who can’t afford laundry delays
- People living in apartments with shared plumbing (more lint, faster clogs)
- Anyone using hard water, which leaves more deposits inside the system
If any of that sounds like you, make cleaning your filter a monthly habit. You’ll avoid bigger issues down the line.
7. Detergent or Softener Isn’t Dispensing Properly?

For weeks, I couldn’t figure out why my laundry smelled weird or why my clothes felt stiff, almost as if they weren’t rinsed properly. I checked the detergent I was using. I even changed brands.
But then one day, while refilling the tray, I noticed something odd—a crusty buildup inside the detergent compartment. I reached in and realized it was hard and slimy at the same time. That’s when it hit me:
My washing machine wasn’t actually dispensing detergent or softener properly.
And I was washing clothes with half the soap—and none of the care.
Why This Happens (More Often Than You’d Think)
Washing machines are designed to automatically release detergent and softener during different phases of the wash. But that mechanism is easy to clog up, especially if:
- You use too much detergent
- You’re using powder in a cold wash
- There’s hard water causing residue buildup
- Or, like me, you just never thought to clean the tray
The result?
- Soap stays stuck in the tray
- Clothes don’t come out clean
- The softener never reaches the rinse cycle
- And sometimes, the drawer overflows or smells bad
How I Fixed It in Under 15 Minutes
1. Removed the Tray and Took a Good Look
Most detergent drawers can be pulled out fully with a little pressure. Once I removed it, I saw mold stains, softener residue, and clumps of undissolved powder.
2. Soaked It in Warm Soapy Water
I filled a bucket with hot water, added dish soap, and let the tray soak for 10 minutes. The grime started loosening on its own.
3. Scrubbed the Nooks and Crannies
Using a toothbrush, I cleaned each compartment, especially the tiny nozzles where water is supposed to flow through. I even used a cotton bud to get into tight spots.
4. Cleaned Inside the Drawer Slot
This was the most forgotten spot. I wiped inside the compartment housing with a damp cloth and some vinegar. That’s where most mold hides.
5. Ran a Drum Clean Cycle
After reassembling everything, I ran an empty hot cycle with vinegar and baking soda to clear out any leftover residue inside the water lines.
What I Didn’t Know (But Wish I Did)
- Softener is thicker than detergent—it clogs faster
- Powder detergent doesn’t dissolve well in cold cycles
- Even “auto-clean” machines don’t clean the drawer compartment
If your clothes feel stiff, smell off, or you notice leftover detergent in the tray after a wash, your washer might not be doing its job properly.
Who Does This Affect Most
- Families using fabric softeners regularly
- Homes with hard water (leaves mineral deposits)
- Anyone using powder detergent for cold washes
- Busy people who often overload the tray (guilty!)
If you’re any of the above, make cleaning the tray part of your monthly routine.
💡 Quick Tips to Keep It Working
- Use liquid detergent for easier dissolving
- Always close the tray gently—slamming it can damage the release mechanism
- Run a hot cycle every few weeks to flush internal pipes
- Wipe the tray dry after each use to prevent slime
8. Increased Electricity or Water Usage?
For a few months, our electricity and water bills had been slowly creeping up. Nothing dramatic—but enough to make me wonder.
“Maybe we’re just doing more laundry these days,” I told myself.
Or maybe the fridge’s power-saving mode wasn’t working.
But the truth? The problem was sitting quietly in the laundry corner. My washing machine.
And I had no idea it was wasting energy just because it hadn’t been cleaned.
How a Dirty Washer Wastes Power and Water
I never realized this before, but when grime builds up inside your washer, it has to work harder—and longer—to get the job done.
Here’s what was happening inside my machine:
- The drum had residue, making cycles take longer to spin clean
- The inlet filter was partially blocked, reducing water pressure
- Excess detergent from past washes had created suds overload, forcing the machine to rinse longer
- The drain filter was clogged, making the washer retry the spin cycle multiple times
All of this added up to:
- Longer cycles
- More water intake
- More electricity is used per wash
And I didn’t notice it—until I saw the numbers on my monthly bills.
How I Fixed It and Cut My Utility Bills
I decided to deep clean everything. Not just the drum—but the hidden parts too.
1. Cleaned the Inlet Filter
This tiny mesh screen, where the water enters the machine, was full of mineral deposits.
I unscrewed the hose, took the filter out with tweezers, and soaked it in vinegar for 30 minutes. The water pressure improved instantly.
2. Flushed the Drum and Pipes
I ran a hot wash cycle with 2 cups of white vinegar and half a cup of baking soda.
It cleared soap scum, limescale, and leftover softener—things that were slowing down rinsing and spinning.
3. Cleaned the Drain Filter and Hose
Just like before, I opened the bottom flap and pulled out the filter.
There was lint, hair, and even a safety pin lodged inside. This was forcing the washer to repeat cycles and use more power than needed.
4. Changed My Detergent Habits
I reduced the detergent quantity (I was using way too much).
Now I follow the “just enough” rule—and my washer rinses clothes faster, with less water.
What I Learned
- Powerful machines become wasteful when they’re dirty
- Most people blame rising bills on ACs, fridges, or general use, but washers are sneaky culprits
- A once-a-month cleaning saves money month after month
Who This Hits Hardest
- Families with kids (more laundry = more waste if the machine is inefficient)
- People living in hard water areas (limescale builds up fast)
- Apartment dwellers with fixed water limits or metered use
- Anyone doing daily washes for uniforms, towels, or work clothes
If you fall into any of these groups, cleaning your washer is no longer optional—it’s essential.
💡 Quick Tips to Keep Costs Low
- Clean inlet and drain filters every 4–6 weeks
- Use hot water cycles at least once a month to break buildup
- Switch to low-foam liquid detergent to reduce rinse time
- Don’t overload the machine—it strains the motor and uses more water per kg
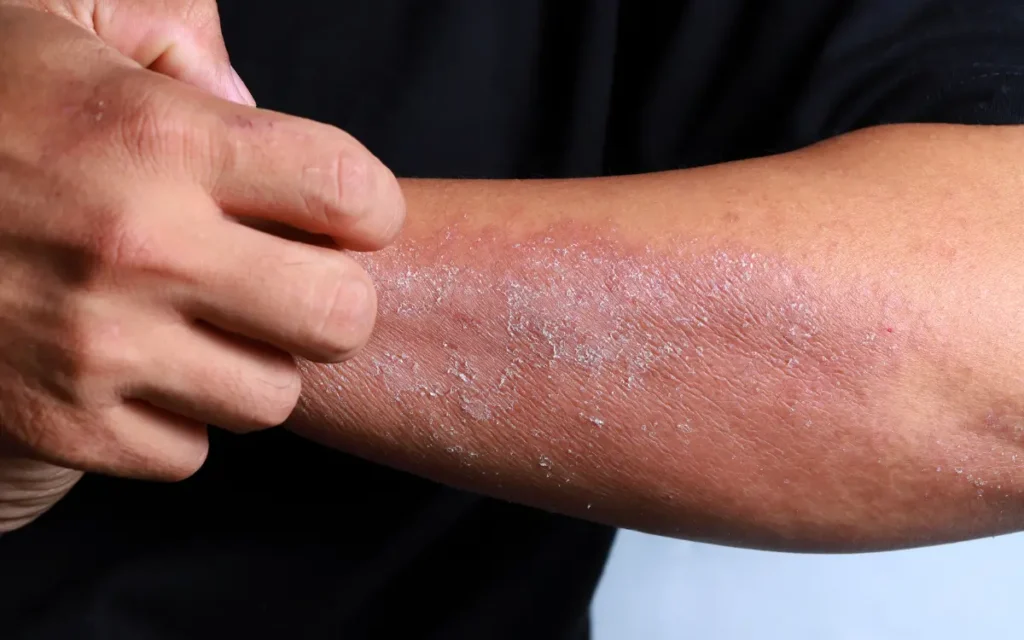
9. Skin Irritation After Wearing Washed Clothes? My Son’s Rashes Were the Wake-Up Call
This one’s personal—and painful.
A few months ago, I noticed red patches on my son’s arms and back. At first, we thought it was a heat rash. But the irritation kept coming back. It wasn’t until my wife said, “He’s fine in the morning, but every evening it starts again,” that I realized the pattern. It was happening after he changed into fresh clothes.
That’s when I had one of those awful parent moments, where you realize the thing causing your child discomfort might actually be your fault.
I rushed to check everything—his soap, lotion, even the detergent. But the real problem?
Our washing machine hadn’t been deep-cleaned in months.
How a Dirty Washer Affects Your Skin
Here’s what no one tells you:
Even if your clothes look clean, a dirty washing machine can leave behind:
- Bacteria
- Mold particles
- Undissolved detergent
- Fabric softener buildup
- And worst of all, residue from previous loads (think sweaty clothes, damp towels, etc.)
When these stay on your clothes, they rub against your skin all day, especially in sensitive areas like underarms, neck, or waistline.
If you or someone in your family has:
- Sensitive skin
- Eczema
- Allergies
- Or frequent itching or redness without a clear cause…
Then your washer could be the hidden trigger.
How I Solved It (and Finally Found Relief for My Family)
I took it seriously. Here’s what worked:
1. Deep-cleaned the Washer Thoroughly
I ran two cycles:
- First, with 2 cups of white vinegar in the drum, and
- Then, with half a cup of baking soda in the detergent tray
This cleared out mold spores, detergent film, and lingering bacteria inside the machine.
2. Cleaned the Gasket and Tray by Hand
I pulled back the rubber seal and found a hidden ring of black grime.
I scrubbed it with a baking soda paste and warm water.
The detergent drawer was no better—softener residue had turned into a slimy layer. I soaked it, scrubbed it, and let it dry completely before using it again.
3. Started Doing an Extra Rinse for Kids’ Clothes
Now, every time I wash my son’s clothes, I run an extra rinse cycle. It adds just 10 minutes—but ensures no soap or softener is left on the fabric.
4. Switched to Hypoallergenic Detergent
We now use a gentle, fragrance-free liquid detergent with no harsh chemicals.
Combined with a clean washer, this made a visible difference in just a week.
What I Learned (That Changed Everything)
- Skin irritation isn’t always about the detergent—sometimes it’s your machine
- A dirty washer keeps recycling old germs and soap back onto your “clean” clothes
- Regular deep cleaning isn’t just about maintenance—it’s about your family’s health
Who Needs to Be Extra Careful
- Parents with babies or toddlers (delicate skin)
- People with eczema or sensitive skin
- Anyone who washes gym wear, socks, or undergarments frequently
- Homes using fabric softener regularly (it builds up faster than detergent)
💡 Prevention Tips I Now Swear By
- Deep clean the washer once a month (set a calendar reminder)
- Run an extra rinse for clothes worn close to the skin
- Wipe down the rubber gasket after every wash
- Use less detergent than you think you need—more isn’t better
- Avoid powder detergent if you live in a hard water area
10. It’s Been Over 2 Months Since You Last Cleaned It? That Is the Problem.
If you’re sitting there thinking,
“Wait… when did I last clean my washing machine?”
And you can’t remember?
That’s your answer.
I used to be the same. I genuinely believed that washing machines didn’t need cleaning. I mean, they clean stuff… so they must be self-cleaning too, right?
Wrong. Painfully wrong.
What I Learned the Hard Way
The first sign was the smell—subtle at first, then impossible to ignore.
Then came clothes that didn’t feel fully rinsed.
Finally, my machine started acting up—longer cycles, loud spinning, and once, it stopped mid-wash with no explanation.
When I opened up the filter, the smell hit me before anything else did.
Behind the detergent drawer? Moldy residue.
Under the rubber gasket? Sludge.
It was like a crime scene in there.
And that’s when it hit me: I hadn’t cleaned the washer in over two months. Maybe longer.
What Happens When You Don’t Clean It
Just like your kitchen sink or your bathroom tiles, your washer needs regular upkeep.
When you skip it, this is what builds up:
- Soap scum and undissolved detergent
- Fabric softener residue (especially if you’re using it often)
- Lint, hair, dirt, dead skin cells from your clothes
- Bacteria and mold in moist areas like the gasket and filter
- Limescale in hard water zones
All of that gets recycled into your clothes with every wash.
And trust me, no one wants to wear “washed-in” grime.
My Monthly Washer Ritual (That Changed Everything)
Once I saw what months of neglect did, I created a no-excuse routine:
✅ Once a Month – Deep Clean
- Hot wash with 2 cups of white vinegar in the drum
- Baking soda in the detergent tray
- Run on the longest, hottest cycle
✅ After Every Wash
- Wipe the gasket and drum with a microfiber cloth
- Leave the door and detergent tray open to air out
✅ Every 2 Weeks
- Check and clean the drain filter
- Rinse out the detergent drawer with warm water
- Look behind the seal for any gunk
It’s simple. Takes 10–15 minutes.
And it saves me from having to deal with musty towels, mold stains, or machine breakdowns.
Who This Applies To (Spoiler: Everyone)
- If you live in a humid area
- If you wash daily or have a large family
- If you use fabric softener regularly
- Or even if you just want your clothes to smell really fresh…
Cleaning your washer monthly is a no-brainer.
Final views on: Your Washing Machine Needs a Deep Clean
At last, I would say, deep cleaning your washing machine is as important as washing your clothes.
As we all know now, it will affect your clothes, sometimes even the health of your loved ones.
Important points to remember:
- Always use the recommended amount of detergent and softener.
- For better results, prefer liquid detergents over others.
- Make sure you deep clean your washing machine every month for better life and wash quality.
- Don’t hesitate to call a technician if you face any issues with your washing machine.
- Check your warranty card, it will save you a lot of money.
I hope you have liked our ultimate guide on Deep cleaning your washing machine.
Tell me in the comments if you have any doubts in the comments.
Also, read about how to choose a new washing machine.
FAQs on Washing Machine deep cleaning
How often should I deep clean my washing machine?
Ideally, once every 4 weeks for average use. If you do laundry daily, live in a humid area, or use fabric softener often, clean it every 2–3 weeks.
What is the best way to deep clean a washing machine?
Run an empty hot cycle with 2 cups of white vinegar in the drum and ½ cup of baking soda in the detergent tray. Scrub the gasket, tray, and filter manually.
Why do my clothes smell bad after washing?
Usually, it’s not the clothes—it’s the washer. A build-up of detergent residue, bacteria, and mold inside the drum or gasket can transfer odors to your laundry.
Can a dirty washing machine cause skin irritation?
Yes. If the washer is dirty, it can leave behind bacteria, detergent residue, and mold particles on clothes, which may lead to itching, rashes, or allergies, especially in kids or those with sensitive skin.
What are the signs that my washing machine is dirty?
Common signs include:
Musty smell from clothes or machine
Slime around the gasket
Detergent not dispensing
Strange noises while running
Increased lint on clothes
Machine not draining properly
Is vinegar safe for cleaning washing machines?
Yes, vinegar is safe and effective for both front and top-load washers. It helps remove odor, mineral deposits, and detergent buildup naturally.
Do newer washing machines still need cleaning?
Absolutely. Even brand-new machines can collect residue, especially with regular use of softener, detergent, or if you’re in a hard water area. Cleaning is still essential.
Should I use powder or liquid detergent to avoid residue?
Liquid detergent dissolves more easily and leaves less residue, especially in cold water washes. Using the right amount matters more than the type.
